How many leather straps we need to make our bespoke shoe Panama? One, to be exact. This strap, however, is about 8 to 9 m (or 26 to 29.5 feet) long. We calculate the length according to the measurements we take on the foot. Length of the foot, measurements of the ball and heel of the foot – it takes some experience, and we have to work accurately.
But all this is necessary before we can move to the next steps. To get the braided shoe in shape, we need lasts like those used by a custom shoemaker.
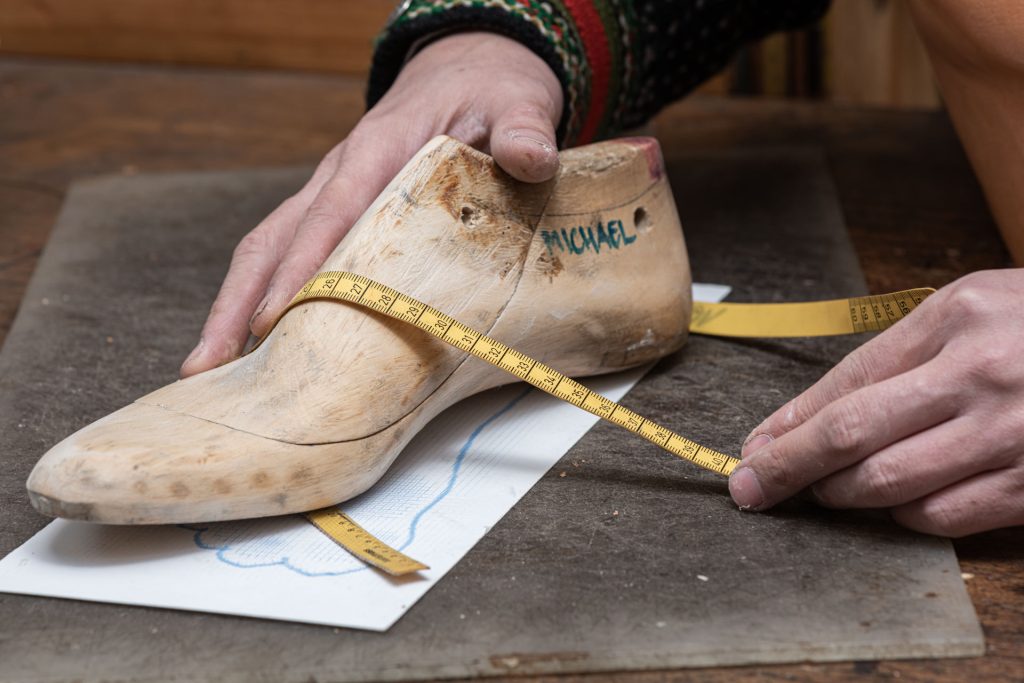
The last of sturdy solid wood is sort of a replica of the foot. We have to model it, and we use a wood rasp if something needs to be taken away, or we attach some leather patches if we need a little more volume. Indispensable and always at hand is the tape measure.
When the last is ready, we prepare the insole, and we keep it a little bit larger than eventually necessary. It is on the grinder that the entire multi-layer sole gets its the final contour, in one of the last working steps. But now it is time to punch the holes we need for the straps for braiding.
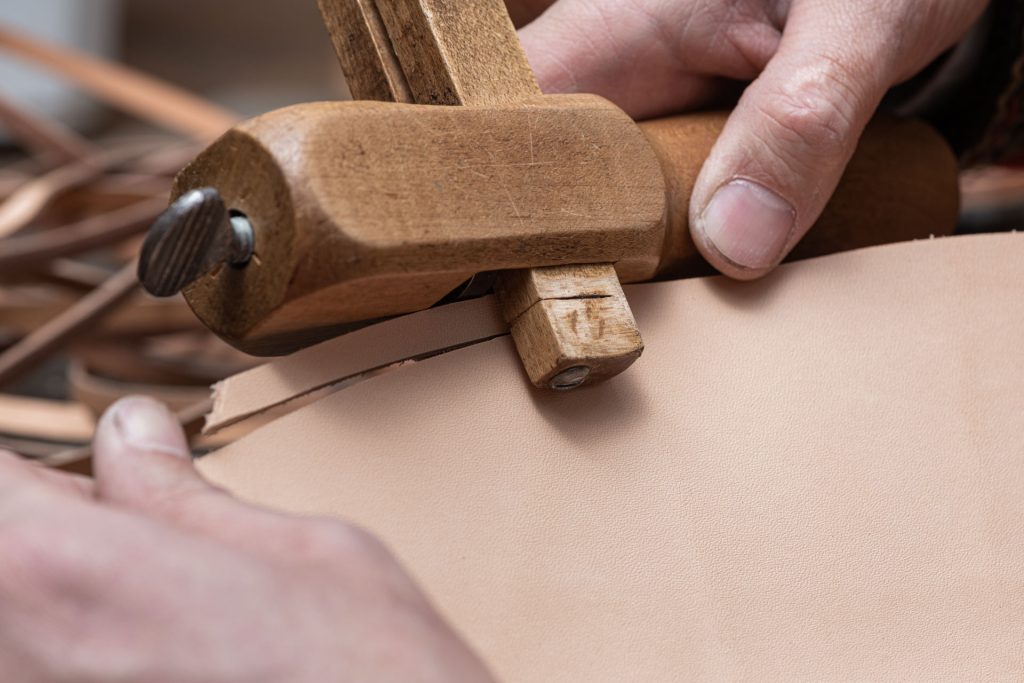
We cut the strap from a single skin so that the grain and coloring is even with the whole shoe. To ensure we get the necessary length, we cut in a circle, then round off the edges, dye the belt and grease it. We calculate the exact length and width according to the shoe size.
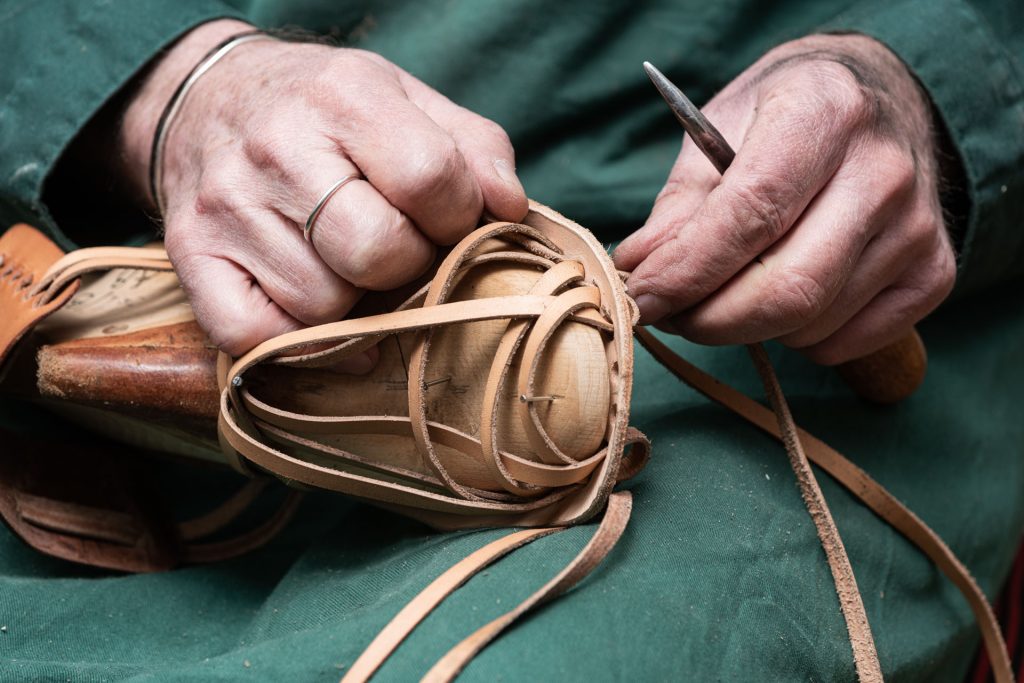
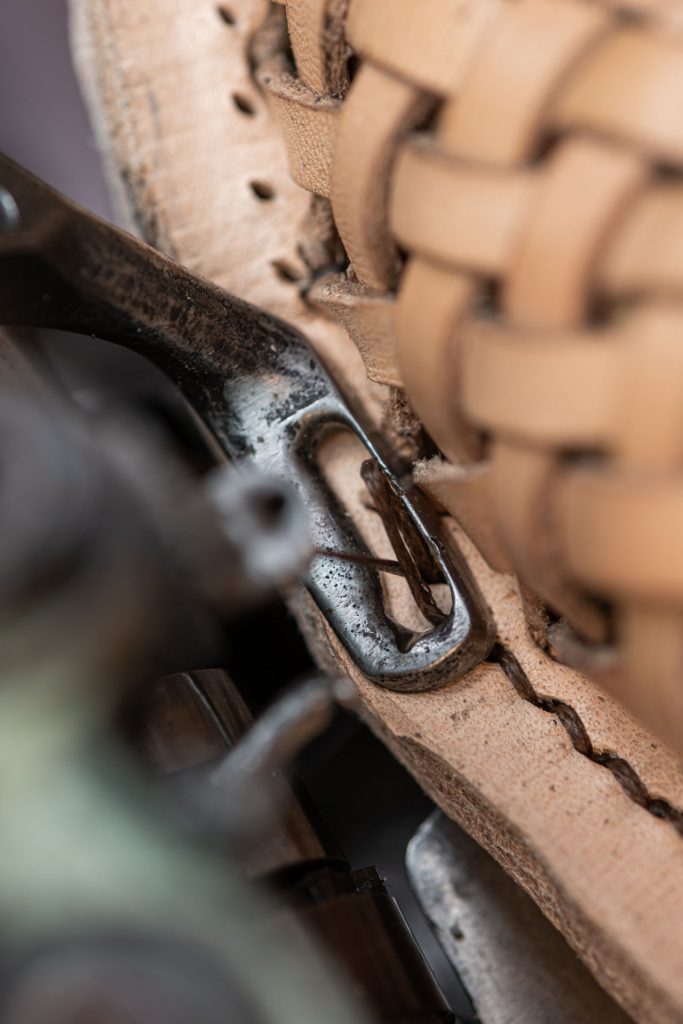
At the heel, there are apparently contradictory requirements we have to keep in mind. It has to provide good support and stay in shape, at the same time it should be comfortable, nothing should chafe. Since we weave the strap many times through the heel leather, it must be sufficiently large. We shape it accordingly, cut the holes for a nice braided pattern, and skive it at the edge so it can give in the right places. The edge of the heel leather gets carefully smoothed with a wooden roller.
We fix the insole to the last with a few pins and then loosely braid the strap through the pre-punched holes. This completes the braiding over the last, i.e. the upper of the shoe, but does not yet give it its final shape.
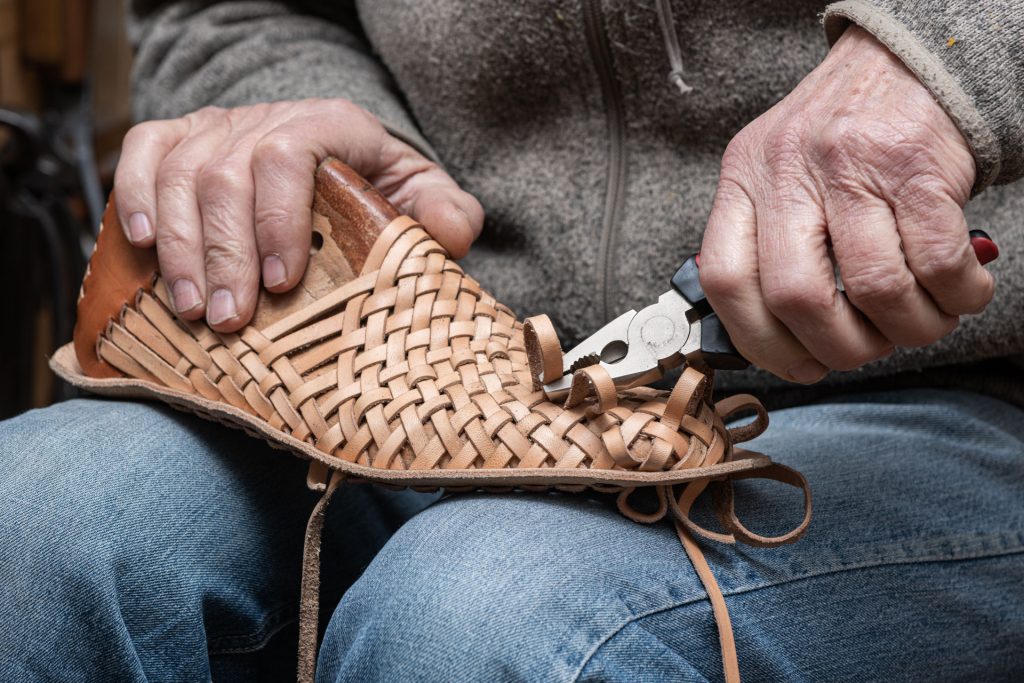
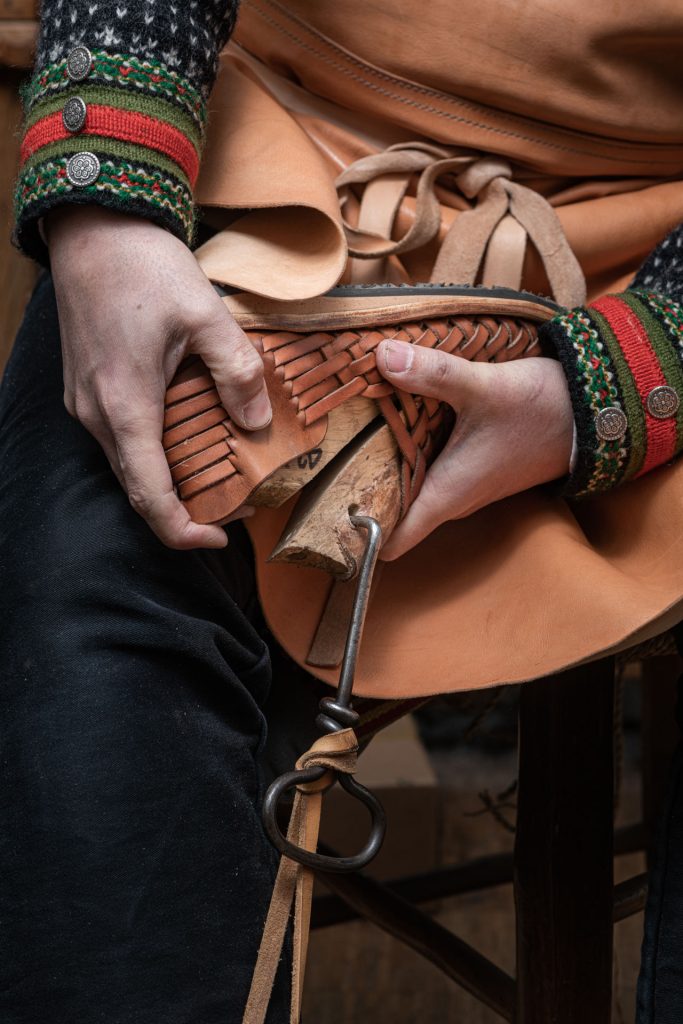
We now tighten the strap from the beginning to the end until it fits the last precisely. In the process, the upper gets formed densely and receives its three-dimensional form. This kind of work not only requires great care, but also some strength, because the strap does not easily run through the ever tighter braiding. On the other hand, this is exactly what ensures that the upper will later holds its shape well.
The next step: the midsole. We glue it to the insole, which also covers the loops of the strap. As with any bonding that needs to hold particularly well, we need some pressure in the process. With a special hand tool, we press the insole and midsole together firmly all around the edge for an extra durable glue joint. The little groves that the tool creates in the rim will last, too. Why we glue at all, if we stitch everything together later? Quite simple. The insole and midsole should not slide against each other when the foot rolls from heel to toe when walking. You would feel and also hear it: The sole will creak when not glued.
The two layers of the sole are now sewn together with our sewing machine. This is a sturdy old machine that can stitch together insole, midsole and the frame of the sole. On the underside of the midsole, the thread is sunk into a groove and thus protected against chafing. And when we replace a worn outsole, the thread will remain intact. Repair and maintenance, that’s part of our concept. Today, this is called “sustainability”. We have always been doing it this way.
Finish on the grinding and polishing machine. The outsole is glued on, the heel is finished. The outsole is made of rubber or EVA, just as you like. Rubber makes the sole a bit mre rigid and is very wear resistant, EVA cushions the step a bit more and is lighter at the same time – it’s a matter of personal preference. On the machine, the entire sole including the heel is ground into shape and polished for a nice finish.
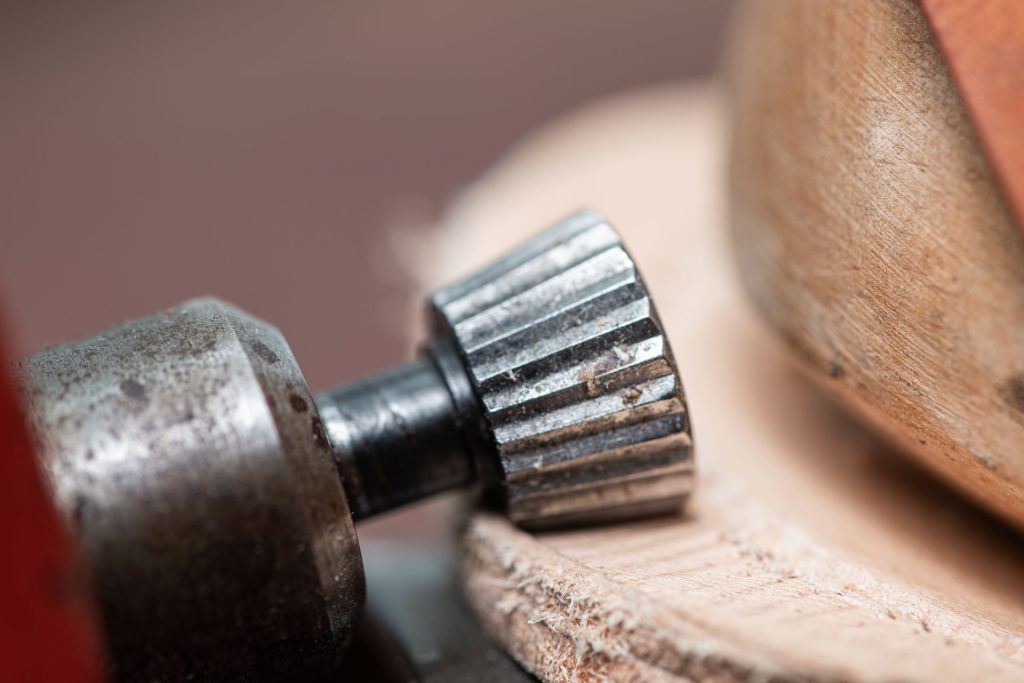
One last time, a well measured amount of force. The last is pulled out of the shoe with a special hook. The last tits really tight in the shoe, and that’s exactly how it should be: After all, it gave the shoe its shape, and we have braided the upper very tightly to the contour of the last.
Which is, in the end, the contour of the foot that we have taken our measures from. That’s what makes a bespoke shoe in the end.
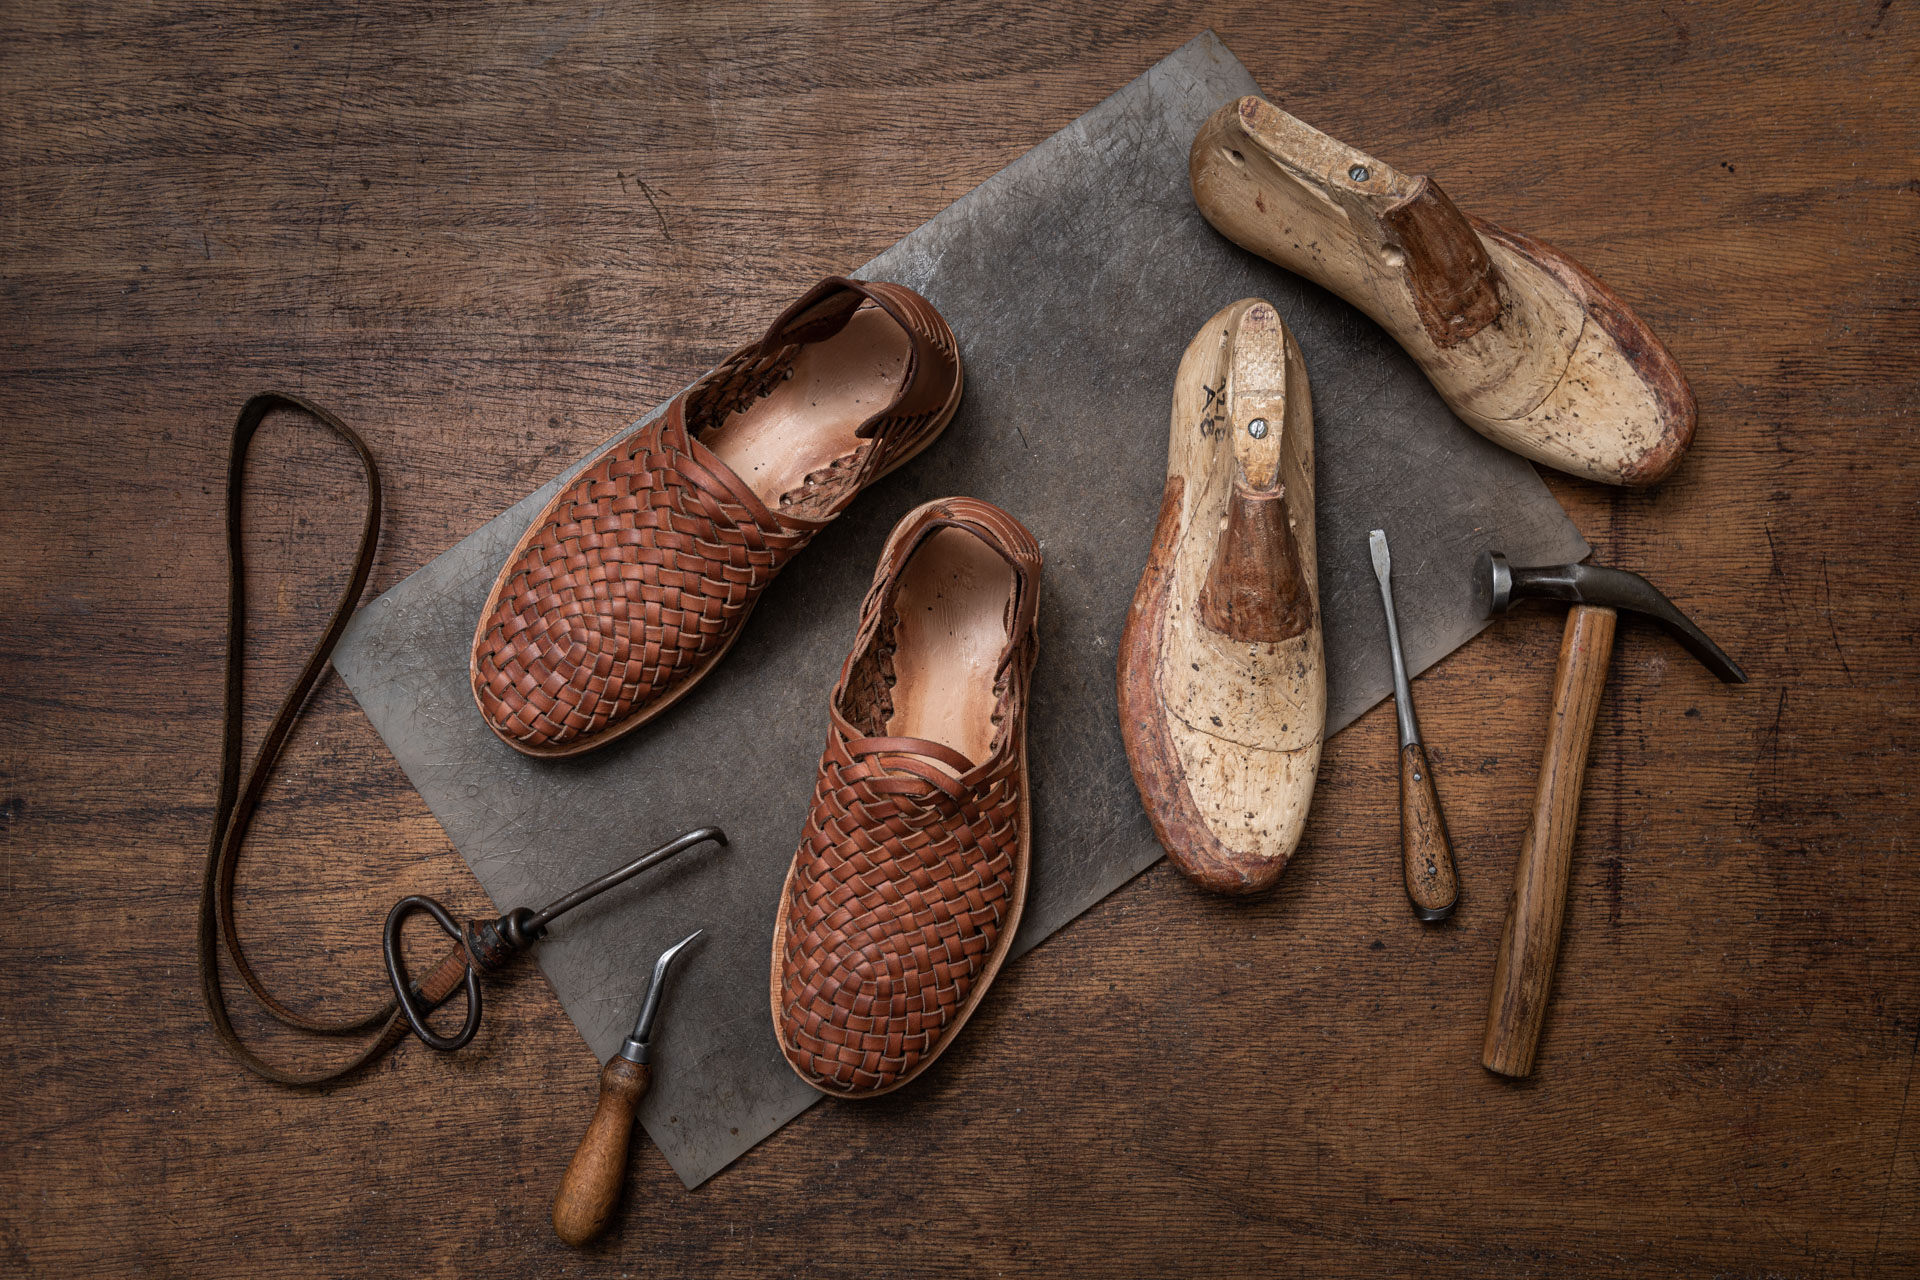
A pair of custom shoes is ready. You can tell the quality, but not necessarily the amount of time and laborious handwork we put into this pair. How carefully we actually have worked becomes evident during the fitting And it shows when the shoe is worn for many years.